
I don't have a picture of the frame itself without the back drop on it.. but if I get bored enough to put it back together, I'll take one for you to see. :)
We went to Lowes and cleaned our store out of the useful 3/4" PVC fittings (I spent a lot of time sitting on the disgusting floor searching through bins to find the right sized pieces we needed), and bought a couple pieces of 5 foot 3/4" PVC pipe. I think all together we probably bought about seven 5' pieces and had a little bit left over. For some reason, buying two 5' pieces was WAY cheaper than buying one 10' piece of PVC in the same size but if the 10' piece is cheaper for you then go for it!
We also bought a PVC pipe cutter which we subsequently broke 10 minutes into cutting the pipes to the right sizes. Whoops. Someone *aheeeeeem*Zac*aheeem* didn't read the directions on how to cut pipe with it. So that's $10 down the drain. It still does it's job, but there's a huge chunk taken out of the blade. Ha
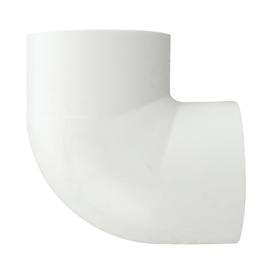 |
| 3/4 inch elbow |
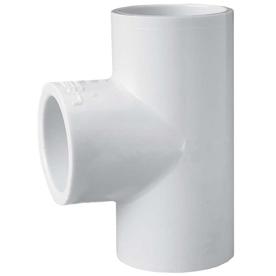 |
| 3/4 inch Tee |
 |
| 3/4 inch coupler |
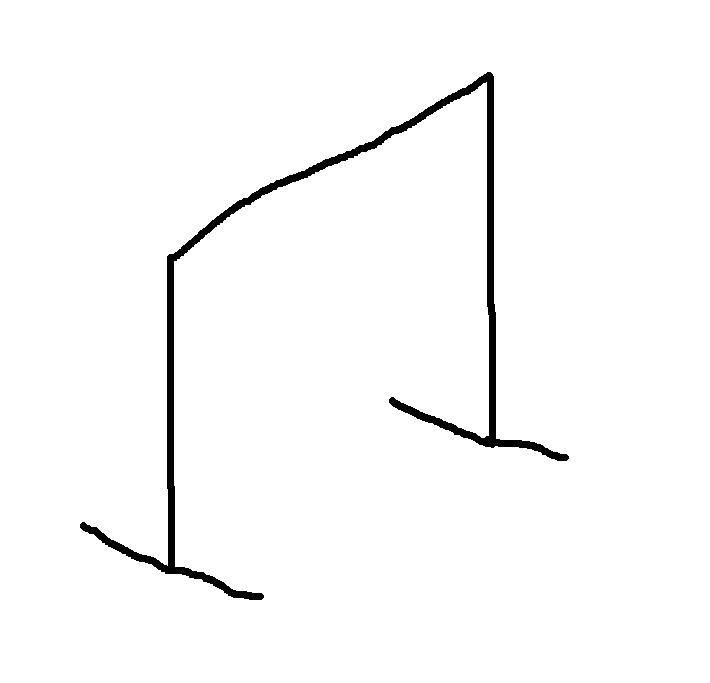
Our first attempt didn't seem sturdy at all. And the bar across the top wobbled. I was worried drunk people might knock it over and break something at the venue. Here is my little doodle so you can see what we had initially.
**Disclaimer: I am NOOOOOT an artist**
**It's OK to laugh!**
If I did this again, I would probably plan it out a bit better. Reading all of this makes my head hurt... but when you look at it, you would never know that Zac was cussing up a storm while cutting the PVC, or that I was getting mad at him for getting mad at building the frame.. haha.
Here is our second and final frame:

We very well could have used more couplers than what I listed on the picture, but you get the idea!
So basically, attach pvc pipes together with couplers to reach desired length. When connecting pipes to make an angle, you need an elbow. When connecting the top to the bottom portion, you need a Tee. Simple.
For the backdrop, I bought a black Queen sized sheet at Wal Mart for about $11. I probably could have found something cheaper, but the dimensions were right, and it was easy and quick.
To attach the sheet and still be able to take it off, I pulled the sheet across the frame until we were holding it where we wanted it. I folded the top half down over the top bar and secured in a couple of spots with safety pins. On the sides, I folded the leftover material over towards the middle of the frame, basically making an upside down L with the top part of the fabric and secured with safety pins in a few spots.


And that's about it! If this makes no sense to you.. it's ok. I'm a little scatterbrained! I also splattered red and white acrylic paint all over the sheet to give it some texture. I was worried people might blend in if they were wearing black, so I wanted there to be some distinction!
Here are some photos of the finished booth!


No comments:
Post a Comment